Safety-first answer: If you are wondering how to record a FaceTime call, start with consent. Recording may require everyone on the call to agree, and audio capture can vary by device, operating system, and settings. If you have permission and your device captures the file reliably, you can save the recording and upload it to HiNoter to create a transcript, summary, and action items.
FaceTime calls often carry more context than a normal meeting. They may include coaching sessions, client conversations, research interviews, family planning calls, remote medical-adjacent discussions, or sensitive personal updates. A recording can preserve details, but it can also create privacy risk. That is why this guide starts with whether you should record, not just which button to tap.
This article is informational, not legal advice. Recording laws vary by country, state, and context. If a call is confidential, regulated, employment-related, medical, legal, financial, or cross-border, get explicit permission and follow your organization's policy before recording.
Before Recording: Consent Comes First
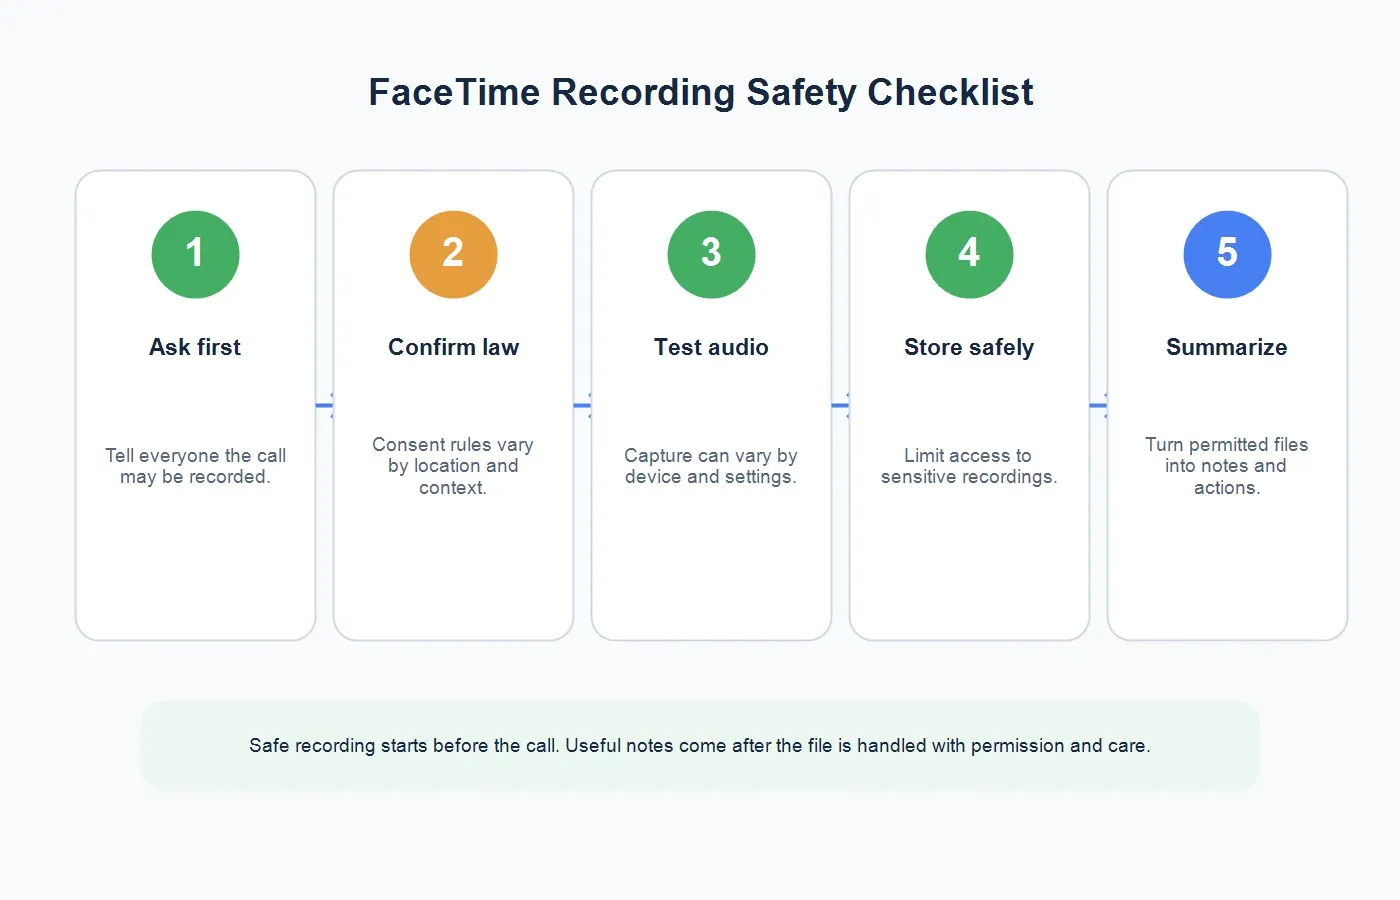
The safest approach is simple: tell every participant before recording starts, explain why you want to record, say how the file will be used, and ask for clear agreement. Do this even if you believe you are in a one-party consent location. It avoids confusion, supports trust, and creates a cleaner record if questions come up later.
In the United States, conversation recording rules differ by state. Some states allow one-party consent, while others require all-party consent. Justia's legal overview explains that federal law generally follows one-party consent, but state laws may be stricter. If people are in different states or countries, treat the stricter rule as the safer default unless counsel tells you otherwise.
For business conversations, consent is not only a legal question. It is also a customer trust question. A client may be comfortable with written notes but uncomfortable with a stored video file. A research participant may agree to transcription but not redistribution. A coaching client may consent to a private recording but not to team sharing. Ask specifically.
A Practical Consent Checklist
Use this checklist before recording a FaceTime call. It is short enough to use in real life, but specific enough to protect the people on the call.
| Step | What to Confirm | Why It Matters |
|---|---|---|
| Purpose | Explain why you want to record the call. | People should know whether the file is for notes, training, evidence, or sharing. |
| Consent | Ask every participant to agree before recording. | Consent rules vary, and all-party consent is the safest default. |
| Scope | Say whether you will keep video, audio, transcript, or summary. | A transcript or summary may feel different from a stored video. |
| Storage | Decide where the file will live and who can access it. | FaceTime recordings can contain sensitive personal or client information. |
| Retention | Set a deletion or review date. | Old recordings create unnecessary privacy and storage risk. |
Can You Record a FaceTime Call on iPhone or iPad?
At a high level, FaceTime recording on iPhone or iPad usually means using the device's screen recording feature. Apple documents Screen Recording through Control Center on iPhone and iPad. You add Screen Recording to Control Center, start the FaceTime call, open Control Center, and tap the record button. If you need microphone audio for your own side or room audio, press and hold the Screen Recording control and check the microphone option before starting.
Do not over-rely on this for important calls without testing. System audio behavior can vary, and FaceTime, iOS/iPadOS versions, device settings, headphones, Bluetooth devices, and privacy rules can affect what is captured. Some users may get video without the expected call audio. Others may capture microphone audio but not the other participant clearly. Test with a consenting friend before using it for an interview or client conversation.
After recording, the file usually appears in Photos. Rename it or add it to a clearly labeled album so you can find it later. If the recording is sensitive, do not leave it mixed with personal photos or synced into accounts where other people can access it.
Can You Record a FaceTime Call on Mac?
On Mac, Apple documents screen recording through the Screenshot toolbar. Press Shift-Command-5, choose Record Entire Screen or Record Selected Portion, open Options to choose a save location and microphone when needed, then start recording. You can also stop recording from the menu bar when the call ends.
Again, audio capture deserves caution. The Mac screen recorder can capture microphone input when selected, but system or call audio behavior can vary depending on settings and routing. If you are wearing headphones, the external microphone may not clearly capture the other person. If you are using speakers, room audio may be captured but with lower quality. Do a short consented test, play it back, and confirm both sides are audible before relying on the setup.
Mac is often better for planned interviews or coaching sessions because you can choose a save location, manage files more deliberately, and use external microphones. It is also easier to upload the finished file into a transcription workflow afterward.
FaceTime Recording Methods Compared
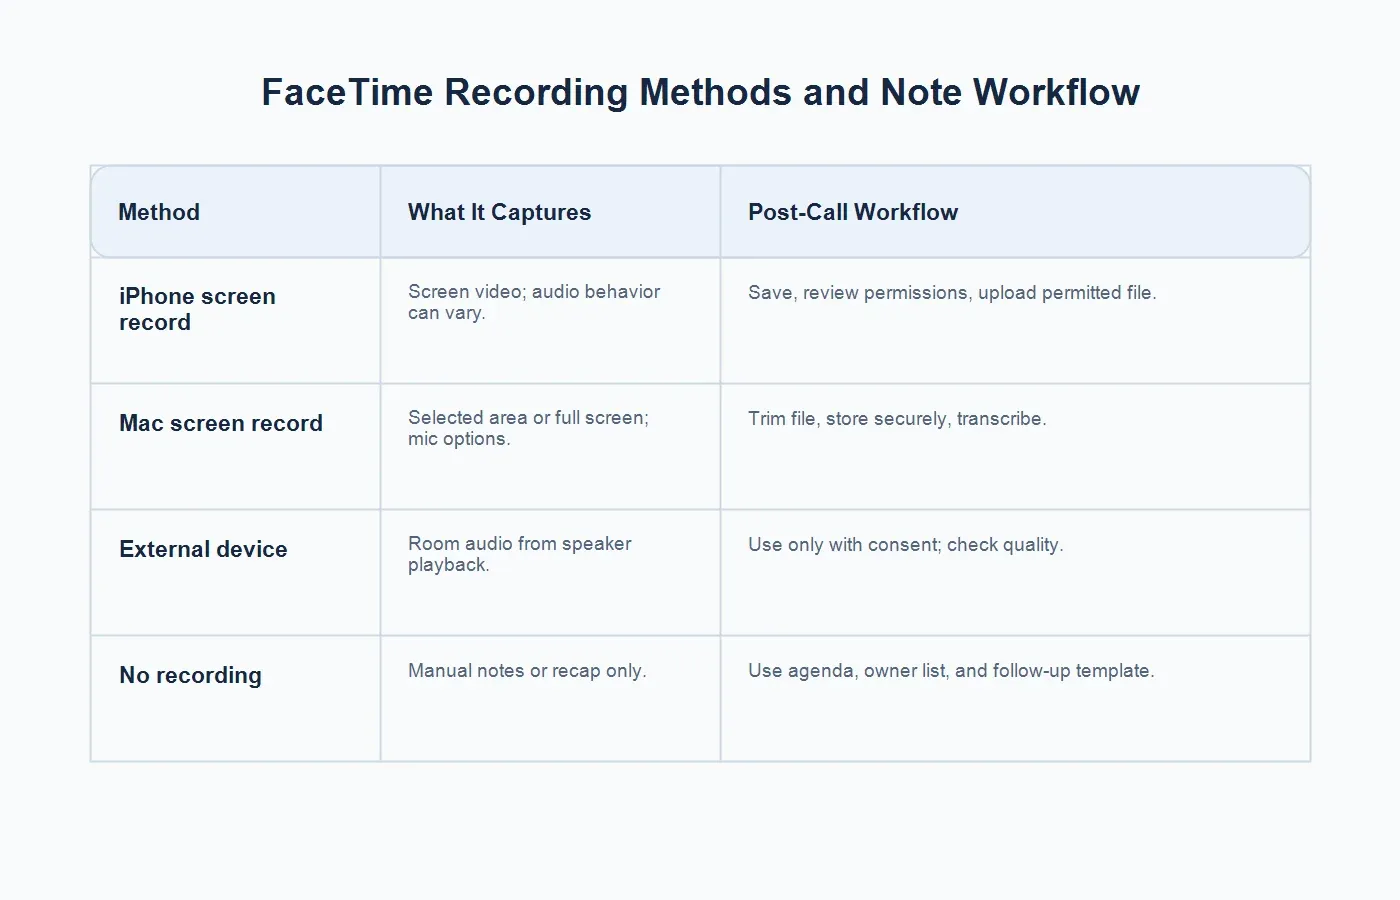
There is no perfect method for every FaceTime call. The right choice depends on device, consent, audio quality, and how the recording will be used after the call.
| Method | What It Captures | Limitation | Post-Recording Note Workflow |
|---|---|---|---|
| iPhone or iPad screen recording | Screen video; microphone behavior depends on settings. | Call audio may not capture consistently across setups. | Save the file, confirm permission, then upload to HiNoter. |
| Mac screen recording | Full screen or selected area, with microphone options. | Audio routing and headphones can affect quality. | Trim the recording, store it securely, then transcribe. |
| External audio recorder | Room audio from speaker playback. | Quality varies and privacy risk is higher if used casually. | Use only with explicit consent, then process the audio file. |
| No recording | Manual notes, agenda, and follow-up recap. | Important details may be missed. | Use a structured notes template and confirm decisions afterward. |
What to Do After You Have a Permitted Recording
A recording is useful only if someone can use it later. A 45-minute FaceTime interview or coaching call may preserve every word, but nobody wants to rewatch the whole file just to find one commitment or detail. The practical workflow is: store the file safely, transcribe it, summarize it, extract action items, and keep source context available for verification.
Device Caveats That Can Affect FaceTime Recording
FaceTime recording is more fragile than many people expect because several layers affect the final file. The call app, screen recorder, microphone setting, speakers, headphones, Bluetooth routing, Focus modes, and operating system version can all change the result. A setup that captured a test call last year may behave differently after an update or after switching from built-in speakers to AirPods.
If the call matters, do a short test in the same conditions you plan to use. Use the same device, same headphones or speakers, same room, and same recording method. Play back the test and check four things: whether the screen is visible, whether your voice is clear, whether the other person's voice is clear, and whether the file saves where you expect. If any one of those fails, change the setup before the real call.
For planned business or research calls, consider using a Mac with a reliable external microphone and a quiet room. For casual family planning calls, a simple iPhone recording may be enough if everyone agrees and the audio test works. For confidential calls, avoid improvised setups that route audio through speakers in a shared room. The simplest method is not always the safest method.
How to Prepare a FaceTime Recording for Transcription
Before uploading a permitted recording to any transcription tool, clean up the file and context. First, trim empty time at the beginning or end if your editor allows it. Long silent sections make the file harder to review and can distract from the useful conversation. Second, write a short note to yourself with the date, participants, purpose, and consent scope. That context helps you interpret the transcript later.
Third, decide whether you need the full video. If the visual content does not matter, audio may be enough. Audio files are often easier to store, process, and share under a narrow consent scope. If the call included screen sharing, facial expressions, whiteboard discussion, or visual demonstration, keep the video only for people who truly need it.
Fourth, remove or restrict sensitive information where appropriate. Do not upload recordings that include private account screens, passwords, health details, children's information, or third-party content unless you are authorized to process that material. If you are working inside a company, use the approved account and workspace rather than a personal upload flow.
What Good FaceTime Notes Should Include
A good note from a FaceTime recording is not a transcript pasted into a document. It should help someone understand the call without replaying it. For most calls, the useful structure is purpose, participants, key points, decisions, action items, open questions, and source context.
For a client call, include the client's goal, constraints, objections, promised follow-up, and owner. For a coaching session, include the theme of the session, exercises discussed, commitments, deadlines, and next check-in. For a research interview, include themes, notable quotes, evidence, participant context, and limitations. For family planning, include decisions, responsibilities, dates, and unresolved questions.
The best notes also preserve uncertainty. If a participant sounded unsure, if a decision was tentative, or if consent covered only limited use of the recording, say that clearly. Clean notes should not turn a nuanced conversation into false certainty. HiNoter can help structure the raw material, but the human owner should review important details before sharing the output.
1. Save and Name the File Carefully
Use a neutral, descriptive name such as "Client onboarding call - July 8 - consented recording" or "Research interview P07 - approved for transcript only." Avoid names that expose sensitive details if the file is stored in a shared folder.
2. Limit Access
Do not send raw FaceTime recordings casually through personal chat apps. Use approved storage, shared drives, or secure workspaces. If the recording includes personal information, client details, or family matters, share only the minimum necessary output.
3. Upload the Recording to HiNoter
For permitted audio or video files, upload the recording to HiNoter's audio to text converter or use the video to text workflow when the visual file matters. HiNoter can turn the spoken content into a searchable transcript so you do not have to replay the whole call.
4. Generate a Summary and Action Items
Once the transcript exists, the next step is structure. HiNoter can create summaries, key points, and action items from the call. For business calls, that might mean owner, due date, blocker, and follow-up. For coaching sessions, it might mean goals, commitments, exercises, and next check-in. For research interviews, it might mean themes, quotes, evidence, and open questions.
5. Keep Source Context
Summaries are helpful, but they should not drift away from the source. With AI meeting notes, teams can keep decisions and action items connected to the conversation record. Source-linked AI Chat also helps when someone asks, "Where did we agree to that?" or "What exactly did the client say about timing?"
Use Cases Where FaceTime Notes Help
Client Conversations
Consultants, coaches, and service providers often need to remember decisions, preferences, requirements, and follow-ups. A permitted FaceTime recording can become a clean client recap with tasks and open questions. Share the summary rather than the whole recording when that better matches the client's consent.
Research Interviews
Researchers and product teams may use FaceTime for remote interviews when participants are already comfortable with Apple devices. A transcript helps recover quotes, but a structured summary helps identify patterns. Keep participant privacy central and follow the consent language approved for the study.
Coaching and Tutoring
Coaching sessions can include goals, exercises, reflections, and commitments. A recording helps the participant revisit the session, but notes are often easier to act on. Summaries can turn a long conversation into next steps for the week.
Family Planning Calls
Some families use FaceTime to coordinate caregiving, travel, finances, or major life events. In these settings, consent and sensitivity are especially important. When everyone agrees, a short summary can be more useful than asking relatives to replay the call.
Alternatives When Recording Is Not Appropriate
Sometimes the right answer is not to record. If someone is uncomfortable, the topic is sensitive, or the law is unclear, choose a lighter documentation method. Use a shared agenda, assign one person to take notes, and send a written recap for confirmation. Ask participants to reply with corrections within a set time window.
For business calls, you can use a decision log: topic, decision, owner, due date, and source context. For interviews, take timestamped manual notes if allowed. For family calls, send a gentle recap with practical next steps. Documentation does not have to mean a full video archive.
Privacy and Retention Best Practices
Keep recordings only as long as they are needed. Delete raw files when a verified transcript and summary are enough for the purpose that was disclosed. If the recording contains personal data, customer information, health details, legal strategy, or financial information, apply stricter access controls.
Separate raw recordings from publishable notes. A summary can often be shared more broadly than the underlying call. For example, a team may need the action items from a client call, but not the full video. A family member may need the caregiving plan, but not the personal conversation behind it.
If you use HiNoter for recurring meeting workflows, make sure participants know how capture works. HiNoter is designed to turn meetings and media into structured notes, but consent and permission still come first. The tool helps with transcription and organization after the source is properly obtained.
Final Takeaway
Recording a FaceTime call is technically possible, but it should never be treated as a casual shortcut. Ask first, understand consent rules, test your device, protect the file, and decide whether a transcript or summary is more appropriate than keeping the full recording.
When you have a permitted FaceTime recording, upload it to HiNoter to create transcripts, summaries, and action items. The result is easier to search, share, and act on than a long video file, while still preserving enough source context to verify important details.
FAQs
Is it legal to record a FaceTime call?
It depends on where the participants are, what the call is about, and which consent rules apply. Some places require all parties to consent. This article is not legal advice; when in doubt, ask everyone and follow the strictest applicable rule.
Can FaceTime be recorded with audio?
Sometimes, but audio capture can vary by device, system version, microphone setting, headphones, and call routing. Test with consent before recording an important call.
Where does a FaceTime screen recording save?
On iPhone or iPad, screen recordings usually save to Photos. On Mac, the save location depends on the Screenshot toolbar options you selected before recording.
What should I do if recording is not appropriate?
Use a shared agenda, manual notes, a decision log, and a written recap. Ask participants to confirm or correct the recap after the call.
Can HiNoter summarize a FaceTime recording?
Yes. If you have permission to process the recording, upload the audio or video file to HiNoter to create a transcript, summary, action items, and source-linked notes.